Cleaning your keyboard might not be the first thing on your mind, but it makes a big difference. Dust, crumbs, and all those little particles can build up over time and mess with your typing experience. Plus, it’s just nice to have a clean workspace!
Start by unplugging your keyboard or turning it off if it’s wireless. Give it a gentle upside-down shake to get rid of any loose debris. A can of compressed air works wonders for blasting out dust from between the keys. Just make sure to hold it upright to avoid moisture getting in.
For a deeper clean, take a damp microfiber cloth and wipe down the surface. If you want to go the extra mile, you can remove the keycaps on some mechanical keyboards. Just check your keyboard’s manual to see how to do that safely. Once off, wash the keycaps with warm, soapy water, let them dry completely, and pop them back on.
To wrap things up, aim to clean your keyboard every month or so to keep it looking fresh and functioning well. A clean keyboard not only looks better but also helps prolong the life of your gear. Happy typing!
Switch Out Bad Keys
We've all been there: one minute your mechanical keyboard's typing like a dream, and the next, a key goes rogue. Whether it's sticking, not registering presses, or making weird noises, bad keys can totally ruin your flow. But don't worry, swapping out those troublesome switches is easier than you think. Let's dive into how to tackle this issue like a pro.
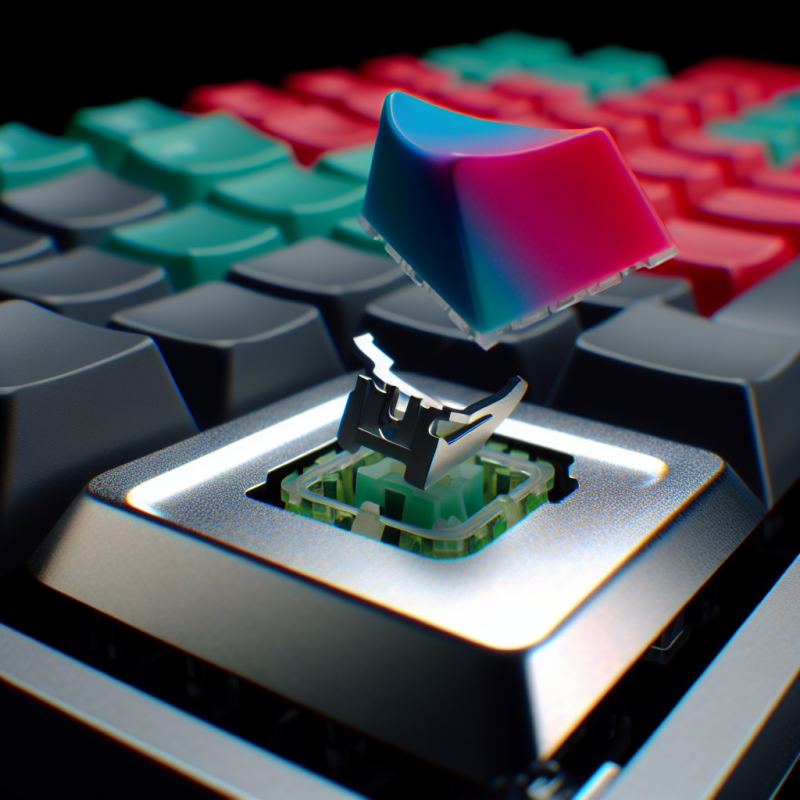
First things first: you'll want to grab a keycap puller. It’s a handy little tool that lets you pop off keycaps without damaging anything. Just position it around the keycap, give it a gentle squeeze, and pull straight up. Voila! You've got access to the switch underneath.
Next, if you're dealing with a hot-swappable keyboard, swapping switches is a breeze. Pull the old switch straight out and push in a new one. Easy-peasy! If your keyboard isn’t hot-swappable, you'll need to desolder the old switch first. Sounds tricky? It might feel a bit daunting, but with a bit of practice, you'll get the hang of it.
Once you've got the new switch in place, it’s time to put the keycap back on. Just line it up and press down gently until you hear a satisfying click. Give it a test type, and you’re good to go! Keeping your keyboard fresh with new switches can make a huge difference in your typing experience.
Lubricate for Smooth Performance
Lubricating your mechanical keyboard can take your typing experience to the next level. It reduces friction, making key presses feel smoother and quieter. If you’ve ever noticed a sticky or less responsive key, a little lube can work wonders.
Start by gathering a few supplies. You’ll need some lubricant—typically, a thin grease or oil designed for switches works best. Look for options specifically made for mechanical keyboards. You’ll also want some tools: a keycap puller, tweezers, and possibly a small brush for applying the lube.
Once you’ve got everything, it's time to dive in. First, remove the keycaps from your keyboard. Be gentle and make sure not to yank them off. After that, take out the switches, if possible. This step lets you apply the lubricant directly where it’s needed. Use a small amount of lube on the switch stems and springs. Less is definitely more here; you want just enough to enhance performance without making a mess.
After you’ve applied the lubricant, put everything back together. Notice how smooth each key feels when you type! A well-lubed keyboard not only improves the feel but can also extend the life of your switches. Plus, it just makes everyday use a lot more enjoyable.
Protect Your Keyboard from Damage
Taking care of your mechanical keyboard doesn’t just keep it looking good—it helps it work like a champ for years to come. A little protection goes a long way in preventing damage.
First up, consider using a keyboard cover. It’s an easy way to guard against dust and spills. If you enjoy snacks while gaming or typing, a cover can save your keys from all those crumbs. Plus, they’re often easy to clean or even toss in the wash.
Another tip? Set aside a space for your keyboard that’s safe from anything that could knock it over. Getting a keyboard tray or a pull-out shelf can keep it out of harm's way. If you travel with your keyboard, a padded case is a must. It’s all about keeping it cushy and protected during those bumpy rides!
Lastly, don’t forget about regular cleaning. Dust and grime can build up between the keys, affecting their feel and response. Grab some compressed air and gently blow out any debris. Cleaning wipes designed for electronics can also do wonders. Just make sure they’re safe for mechanical keyboards.